Master Flow Diagrams Before AI-Powered Automation
A simple method for flow diagrams that everyone can follow
Before understanding AI-powered workflows, you must master flow diagrams.
If you can’t map your process clearly, you can’t automate it. Tools like Zapier, Power Automate, or Make can connect apps and even add AI into the flow, but if the workflow itself is messy, the automation will fail or create more problems.
Why most flow diagrams fail
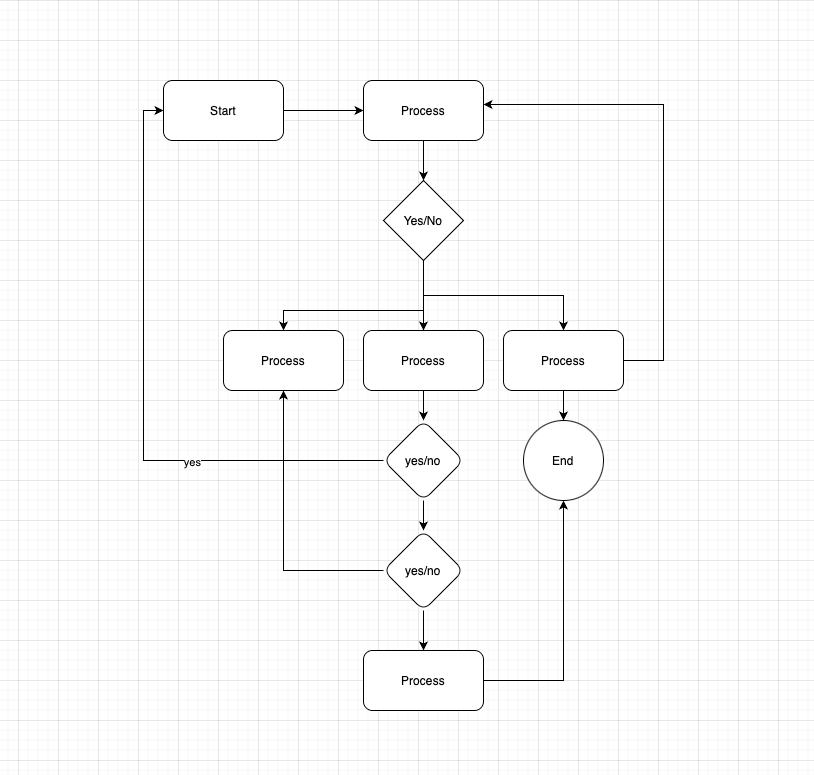
Too many people treat flow diagrams like mind maps — overloaded with shapes, colors, and personal styles.
Most tools encourage this by giving too much freedom. The result? Unuseful diagrams.
As a consultant, I need all the company departments to align on how they document their work processes. The best way I’ve found is to share a very simple methodology, one that can be taught quickly, brings results fast, and can scale up in complexity.
The waterflow logic
That’s why I use a strict, simple standard. I think of a diagram like a water system: it flows from top to bottom, “Yes” always flows downward, and “No” always flows to the right. This creates clarity and discipline.
The rules are:
Start → always a circle at the top.
Process → only rectangles, always in sequence.
Decision → a diamond, with “Yes” flowing down and “No” flowing right.
End → a circle at the bottom.
No decorations. No extra shapes. Just flow.
Important note: the objective of your first diagram is to complicate simplify.
This approach supports teams to think logically. Once processes are mapped this way, they’re easier to discuss, improve, and eventually automate.
Example: the Sales process forest view
At the top level (the first flow diagram) your diagram should look almost too simple, and that’s the point.
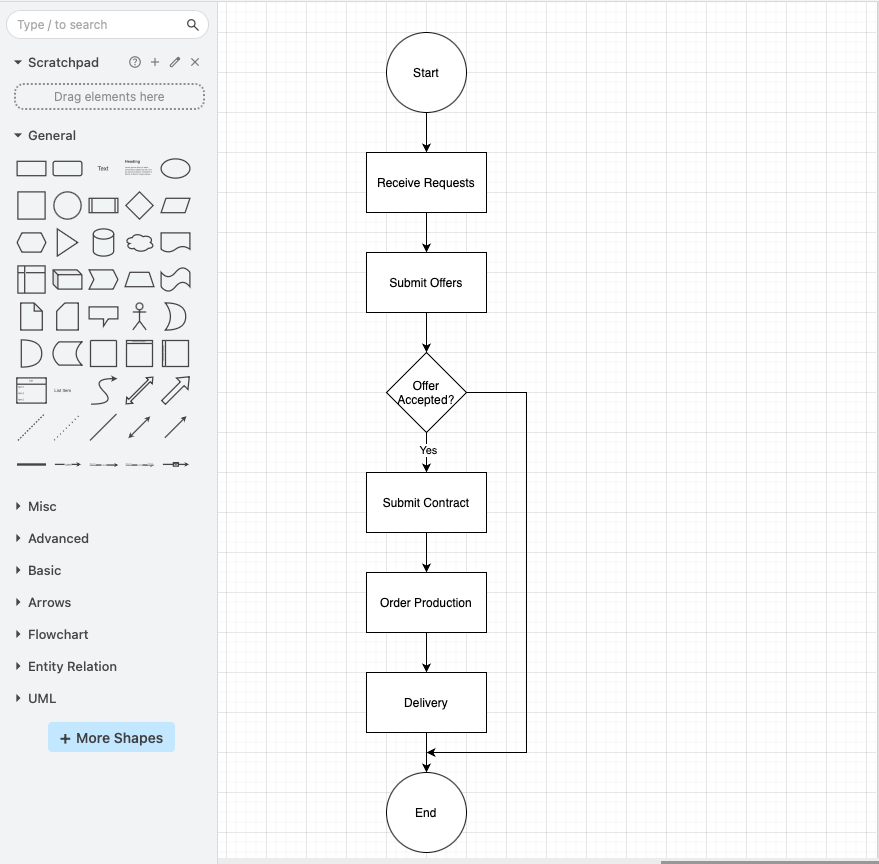
For example, a Sales process might flow like this:
Start → Receive requests → Submit offers → Decision: Offer accepted? →
If Yes ↓ → Submit contract → Order production → Delivery → End
If No → End
Notice how clear it is. No extra details, no decorations. Just the backbone of the process.
Each of these steps (like “Submit offers” or “Order production”) can later be expanded in its diagram. A top-level process can include many processes within, and they’ll be presented in subsequent diagrams.
There’s no shame in having a very simple diagram at the top level; that’s exactly what you want. It keeps everyone aligned before diving deeper.
A few more rules
To keep diagrams clean and consistent, a few extra rules apply:
After a Decision (Yes or No), you should never point directly to another Decision. There must always be a Process in between.
Any arrow that loops back to the Start should connect to the arrow that flows out of the Start shape (not the shape itself).
Any arrow that leads to the End should connect to the arrow flowing into the End shape (not directly into the End circle).
These rules might sound strict, but they’re what make diagrams reliable, scalable, and easy for everyone to read.
Connecting the bigger picture
Once the first, top-level diagram is finished, each Process can be documented independently in its separate diagram. This makes the method scalable — you start simple, and only expand where detail is needed.
The top-level diagram can also be presented to different company teams to see how their processes connect across departments.
This step is often eye-opening: teams realize where handovers happen, where work gets duplicated, and where gaps exist.
Finally, the company should be able to map all the top-level diagrams into one master diagram. That master view becomes a living map of how the organization truly works — the foundation for digitalization and, later, automation.
What to do next
Once you have the master diagram, you’ll be able to clearly see:
Which processes already use software
Which ones are still manual tasks
Which ones could be automated
Don’t assume that processes already supported by software are fine — many of them will need improvements too.
The key is to focus on critical processes first. Ask:
Where is the most time being lost?
Where do errors create the biggest problems?
Where would automation make the most impact?
From there, you can begin experimenting with no-code and low-code workflow automation tools (like Zapier, Power Automate, or Make) to build AI-powered workflows on top of a solid foundation.
But there’s still more to think about:
Where will you store your data and documents? How will you access them so your workflows actually bring value?
That will be the topic of our next post.
Love,
Jose.


Sorry guys! I published this Post on the wrong Publication.
Anyway... talking about Fear and Adventure... I got paralyzed!
Thanks for your understanding.